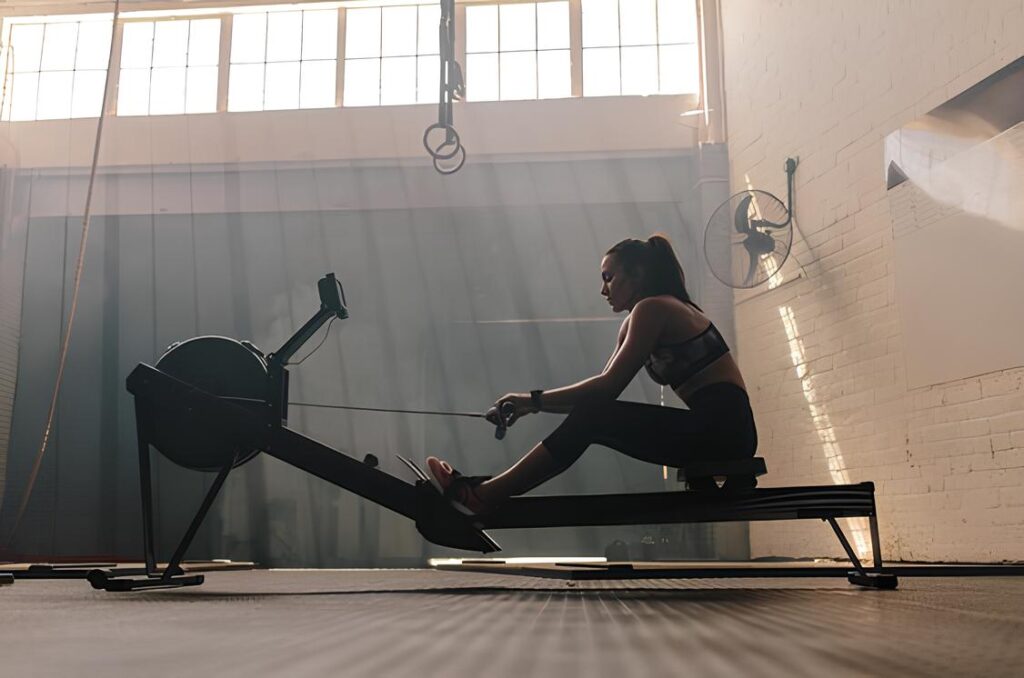
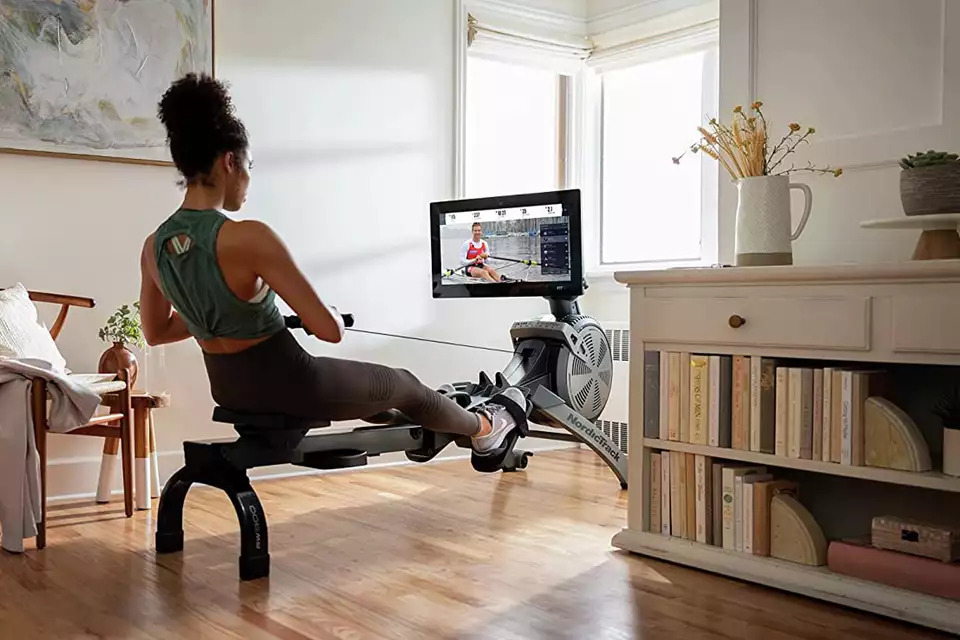
The rowing machine is currently very popular.
Rowing classes can be found everywhere, and professional and Olympic athletes often emphasize the machine’s ability to deliver a comprehensive full-body workout.
All of that sounds great, but how exactly do you use it?
Well, you’re in the right spot to find out, my friend.
Many clients in our Online Coaching Program express their desire to begin rowing but lack knowledge about how to get started. Today, Personal training Toronto will outline how we initiate rowing machine workouts for them.
Here’s what we’ll discuss:
- How to use a rowing machine (with video tutorial).
- What are the benefits of using a rowing machine?
- Rowing Machine 101: Terms to Know
- The four parts of the rowing stroke.
- When to add the rowing machine to your workout.
- Should a beginner use a rowing machine? (Next Steps)
How to Use a Rowing Machine (Video Tutorial)
In the video above, Coach explains the ins and outs of using a rowing machine.
He also knows a thing or two about using a rowing machine, since he’s gotten several CrossFit certs (they love the rowing machine at CrossFit).
If you’re going to learn about using a rowing machine, he’s not a bad person to talk to.
But first, let’s back up here a bit…
What Are the Benefits of Using a Rowing Machine?
The rowing machine was initially created to help water rowers train during their off-season.
You may hear the indoor rowing machine referred to as an ergometer, often shortened to “erg” or “ergo.” This name is derived from the fact that rowing machines typically measure the energy generated during a workout in units called ergs.
The popularity of rowing machines has soared due to the various impressive features they offer.
For instance, the benefits of utilizing a rowing machine include:
- Comprehensive Full-Body Workout: Utilizing the correct rowing technique engages and targets every major muscle group in the body, including the upper, lower, and core muscles. This is a significant factor contributing to their widespread popularity.
- Low-Impact: Despite the potential for an intense workout, using a rowing machine is considered to have minimal to no impact on the joints. Consequently, it is recommended for individuals with conditions like osteoarthritis.
- Versatility: The rowing machine, or ergometer, offers a wide range of training options. You can focus on duration, intensity, perform a high-intensity interval training (HIIT) session, or integrate it with bodyweight exercises in a circuit. Moreover, some rowing machines are designed to fold, making them ideal for individuals with limited training space.
Now, let’s delve into some terminology to familiarize you with the components of the ergometer.
Rowing Machine 101: Terms to Know
When it comes to the rowing machine, there’s some vocabulary that would be worth discussing quickly.
First, let’s chat about the rower itself.
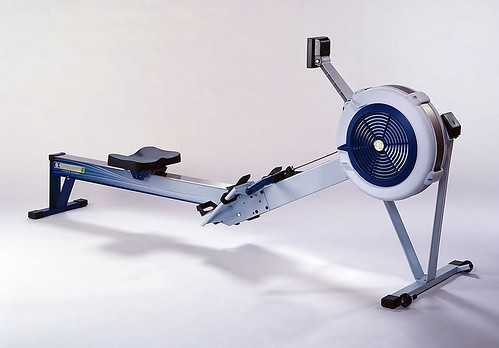
HERE ARE THE PARTS OF THE ROWING MACHINE:
1) Foot Plate – no matter the rower, there will be a place for you to strap your feet in.
You’ll want to set your feet so that the strap goes over the ball of your foot. This will allow you to have the most powerful stroke.
You should be able to lift your heel in this position.
2) Handle – also called “the bar.” This replicates the handles of an oar.
Your hands should be approximately shoulder-width apart.
3) Rail – the central beam of the rower, which allows the seat to roll forward and back.
4) Display Monitor – while these will differ from model to model, the rower will normally have a screen to show some basic info:
- Strokes per minute (Stroke Rate)
- Split Time (more on this momentarily)
- Duration of workout
Etc.
For the Concept2 model – the rower сoach demonstrates above – you can hit any button and select “Just Row.”
This will be the easiest way to get going.
5) The Damper – The lever on the side of the flywheel housing (or fan cage) that controls airflow.
The difference in Damper settings:
- The higher the setting, the more air is allowed to flow. This requires more work to spin the flywheel.
- The lower the setting, the less air is allowed to flow. This requires less work to spin the flywheel.
Think of this sort of like bicycle gears – it affects how the rowing feels but does not necessarily reflect the resistance:
- A setting of one will feel fast and easier to pull, but you’ll need to move quickly to generate power.
- That said, cranking the damper up to ten doesn’t mean a better workout either. It just means a tougher pull – like trying to move a rowboat.
We recommended you aim for a Damper setting between 3 and 5 (which is also where most competitive rowers have it).
Note: some indoor rowers use a water tank to create resistance, so any similar Damper setting controls the amount of water moving through the system. You can still use the same recommendations for damper numbers.
More on that here:
Next, let’s talk about some terminology for the sport of rowing itself.
Rowing has been around for centuries and a lot of the vocabulary has carried over to the indoor sport.
ROWING TERMS TO KNOW:
1) Split
Split time refers to the time it takes to row 500 meters, also known as the “split per 500.” This will likely be shown prominently on your Display Monitor.
If the number goes down, it means you’re going faster! Woot.
2) Strokes Per Minute (SPM)
This is also called Stroke Rating and it’s exactly what it sounds like: the number of strokes you take per minute.
A higher SPM doesn’t necessarily mean you’re going faster – you can also go faster by putting more power into each stroke.
3) Paddle (or Rest)
Normally in the sport of rowing, you never stop completely. You just row or “paddle” a little bit easier.
Sort of like you do in HIIT workouts.
However, if you need to stop completely in your workout, don’t stress it. It’s fine to even get off the rower from time to time…it’s not actually a boat.
You do you.
Next, we need to discuss the four parts of the rowing stroke, but we’ll jump to a new section for that.
The Four Parts of the Rowing Stroke
The rowing stroke is divided into four distinct phases:
- The Catch
- The Drive
- The Finish
- The Recovery
This sequence appears as follows:
1) The Catch
This marks the beginning of the stroke:
- Our knees are in a bent position, and our shins are approximately vertical.
- Our body is slightly leaned forward, roughly at a 1 o’clock position, and our arms remain straight.
For example:
This places us in the optimal position for power generation.
2) The Drive
As the name implies, this is where we focus on generating power for the stroke.
The sequence of power generation is crucial:
- Begin with the legs
- Follow by leaning back with the body
- Lastly, engage the arms
The process appears as follows:
These transitions should flow seamlessly into one another, and a helpful mnemonic is:
- Legs
- Torso
- Arms
A beneficial exercise to refine the Drive:
Commence with focusing solely on the legs:
THEN engage the legs and incorporate a gentle backward lean with the body:

FINALLY, synchronize the legs, body, and arm pull simultaneously:
This can be accomplished whether or not you have the rowing handle.
Frequent errors during the Drive phase:
A) Initiating a forceful pull with the arms initially. Early bending of the elbows is noticeable. This significantly diminishes the power output during the stroke.
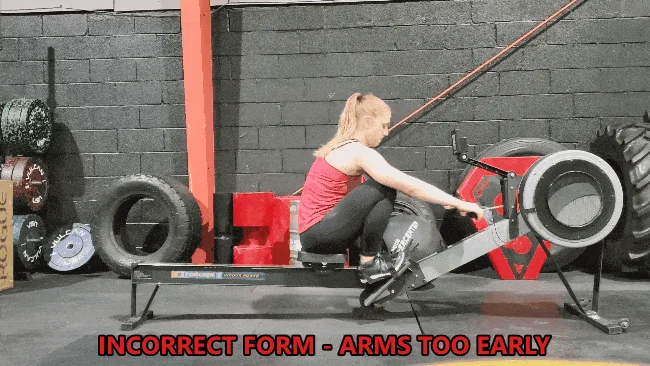
We aim to maintain straight arms and delay bending them until the handle has gone beyond the knees.
B) Allowing the body to move forward while we are exerting force with the legs.
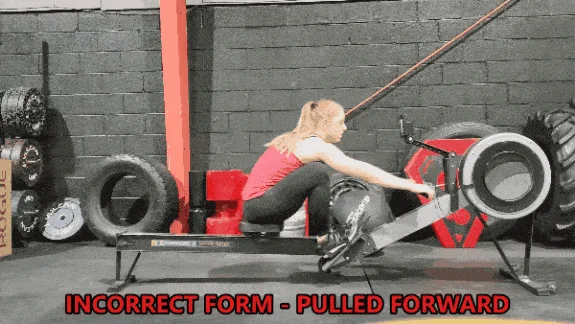
Instead, we aim to maintain a firm and steady core to seamlessly transition from the leg drive to the body lean.
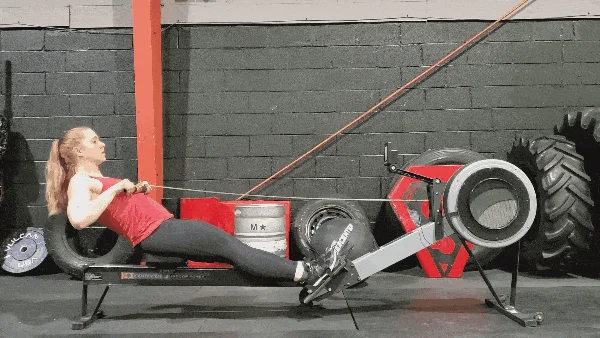
3) The Finish
This is the posture we achieve after the Drive:
- Our legs are fully extended, and our body leans back slightly.
- The handle is positioned around our solar plexus.
- Shoulders remain relaxed and wrists are in a straight position.
A beneficial exercise for refining the Finish is to focus on the arm movement.
Maintain full leg extension and a slight backward lean. Afterward, initiate the arm pull.
Frequent errors during the Finish phase:
A) Elevating the shoulders, bringing them close to the ears.
Typically, this is seen along with wrists bending and arms resembling a ‘chicken wing’ position.

Instead, we aim for shoulders to be lowered and elbows positioned closer to the sides. Maintain enough space between the arms and body, allowing a grapefruit to fit.
B) Raising the handle excessively high, towards the neck or face.
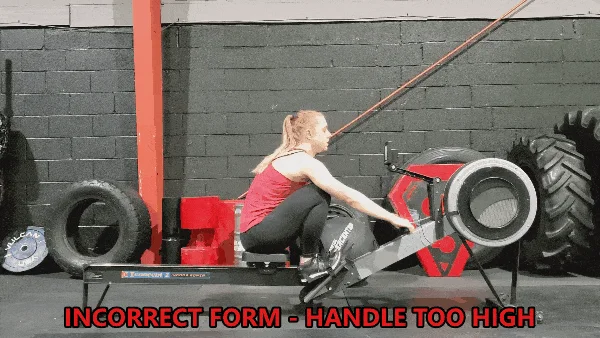
We aim to position the handle at the solar plexus level, avoiding an upward trajectory resembling a path in the solar system!
C) Avoid excessive backward lean – we’re not attempting a solo luge performance!C) Avoid excessive backward lean – we’re not attempting a solo luge performance!
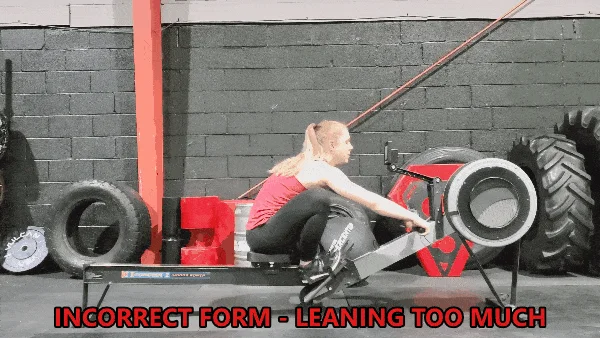
We should lean back just a bit, reaching around an 11 o’clock position.
4) The Recovery
This marks the transition back to the initial position.
- Similar to the structured sequence for the Drive – legs, body, arms – we maintain a particular order for the recovery by reversing it – arms, body, legs.
- Begin by extending the arms, then slightly lean the body forward, and finally, bend the legs to return to the Catch.
Frequent errors during the Recovery: Premature bending of the legs during the recovery phase. You’ll realize this is happening when you find yourself needing to lift the handle up and over the knees. Instead, wait for the handle to CLEAR the knees before bending the legs completely.
There you have it, the four components of the rowing stroke.
With practice, you’ll undoubtedly improve, I assure you.
Rowing shares a similarity with golf: both involve an unyielding quest for the perfect stroke.
One effective way to assess your technique is by recording yourself executing a rowing stroke.
If your form closely resembles the demonstrations in the gifs and videos provided in this guide, you’re on the right track!
And, if you desire an expert assessment of your technique, you can conveniently arrange it through us.
When to Add the Rowing Machine to Your Workout
A rowing machine can fit into our workout in all sorts of ways.
We can row:
- At the beginning or end of a workout routine.
- As part of interval (HIIT) or circuit training.
- For the entire workout itself.
If you want to give the rowing machine a whirl, including it as part of your warm-up wouldn’t be a bad idea. Since it’s a full-body exercise, it’s a great way to prep our body for the workout ahead.
To warm up with the rower, aim for about 5-10 minutes at a steady pace.
Once you get the hang of the rower, you can look to incorporate it with some of these ideas:
1) Interval Training
Interval training or HIIT is all about flipping between intensity.
Going hard one moment, then resting another.
So after your warm-up, you could row intensely for two minutes, rest or “paddle” for a minute or two, then back to intensity.
A fun way to do this is to build up the duration and then pull it back with a “Meter Pyramid.”
To Row a Meter Pyramid:
- One minute of intensity, followed by one minute of paddle.
- Two minutes of intensity, followed by two minutes of paddle.
- Three minutes of intensity, followed by three minutes of paddle.
- Four minutes of intensity, followed by four minutes of paddle.
- Three minutes of intensity, followed by three minutes of paddle.
- Two minutes of intensity, followed by two minutes of paddle.
- One minute of intensity, followed by one minute of paddle.
If you start this off with a 5-minute warm-up, it’ll take about 37 minutes.
2) Circuit Training
You could also mix in some other exercises as part of your rowing workout. Flipping between rowing and some bodyweight exercises, for example.
Here’s an example Row Machine Workout Circuit:
- Row for 500 meters
- 10 push-ups
- 10 bodyweight squats
Repeat.
We could aim for 3-4 circuits here, but even 1-2 is a great start.
3) Steady State
This is exactly what it sounds like: rowing at a constant pace.
After a warm-up, find a pace that you can stay with. Then stay with it.
A good frame of mind here would be about 50% of your effort, but don’t overthink this.
Put on a good podcast or your favorite playlist, find a Stroke Rate you can maintain for 10-30 minutes, and get rowing.
You can pretend you’re in a competition if it helps!
Also, mix and match! The important thing is that you’re doing some type of workout. Don’t fret if it doesn’t fit into the exact format you find here or on other websites.
Should a Beginner Use a Rowing Machine? (Next Steps)
So, here’s the scoop, my friend.
You’ve got all the essentials to kick off your rowing adventure.
No need to stress if you’re not nailing everything perfectly right from the start.
Just like anything else, you’ll improve with practice.
And don’t worry, you won’t be tossed into the water while using an indoor rower.
However, if down the line you fancy taking it outdoors, there are numerous leagues and clubs you can become a part of.
It’s an excellent opportunity to socialize and expand your circle of friends!
Of course, you’ll require access to some body of water, but if you reside near a lake or a sizable river, chances are there’s a team eager to welcome you.
Begin by practicing indoors for a bit, then summon 20 seconds of courage to venture out.