The Inverted Bodyweight Row stands out as a top-tier, uncomplicated, highly efficient exercise for strengthening your ‘pull’ muscles.
Whether you’re striving to achieve your initial pull-up or already incorporating pull-ups into your routine, this exercise is essential.
This is precisely why we incorporate it into the workout plans Personal training Toronto for our Online Coaching Clients.
Today, I will elaborate on the reasons behind this, almost as if you were a part of our program.
As a segment, this guide will encompass all the essential information about this fantastic exercise:
- What is an inverted row or bodyweight row?
- How to do an inverted bodyweight row properly (with video).
- How to progress with inverted bodyweight rows (6 variations)
- When should I do inverted rows in my workout?
- How to do bodyweight rows at home with your kitchen table.
What is an Inverted Bodyweight Row?
You’ve probably heard of the regular barbell row. You pick up a barbell, bend over at the waist (keeping your back straight), and pull the weight up towards your chest.
It looks something like this:
This can be a great exercise, but improper form could cause complications or you might not have access to a barbell and plates.
Luckily, the bodyweight row (or inverted row) takes care of all of that.
By the way, I’ll be using “bodyweight row” and “inverted row” interchangeably in this article.
To-may-to, To-mah-to.
When doing this movement, you only need a bar to lean back from and your body weight. There’s also no extra stress on your back, like with a traditional barbell row.
As an added bonus, you get a decent core workout too.
I know, that’s worth celebrating.
Think of it like this: “bench press” is to “pushing” as “inverted row” is to “pulling.”
Balance FTW!
Why the inverted bodyweight row is so great:
I’m a huge fan of compound exercises (like the squat and deadlift, pull-ups and push-ups), and I’m also a huge fan of exercises that don’t require expensive machines or lots of extra bells and whistles.
AN INVERTED ROW WORKS ALL OF YOUR PULL MUSCLES:
- All of your back muscles
- Your biceps
- Your forearms
- Your grip
- All the stabilizer muscles in between that make those muscles work together.
If you’ve been doing bench presses regularly, start doing an equal amount of work with your pull muscles to stay in balance and away from injury.
Oh, and if you want to eventually be able to do pull-ups THIS is the exercise you need to add into your routine until you can do a full pull-up.
How To Do An Inverted Bodyweight Row

Let’s start with the people who have access to a gym (see a no-gym variation here):
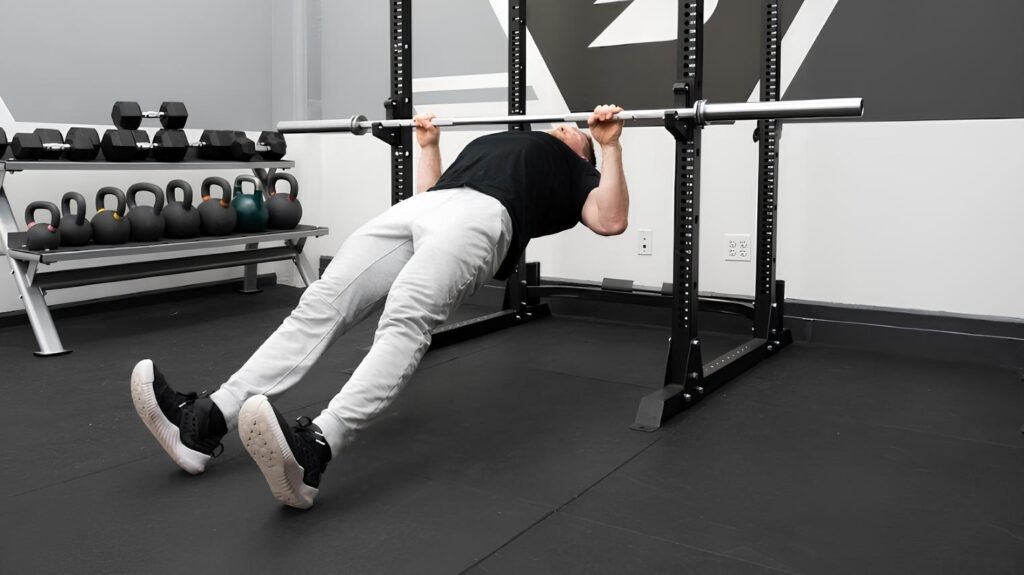
HOW TO DO AN INVERTED ROW OR BODYWEIGHT ROW:
- Set the bar (or your rings) around waist height. The lower the bar, the more difficult the movement becomes.
- Position yourself under the bar lying face up. Lie on the floor underneath the bar (which should be set just above where you can reach from the ground).
- Grab the bar with an overhand grip, slightly wider than shoulder-width (palms facing AWAY from you).
- Contract your abs and butt, and keep your body a completely straight line. Your ears, shoulders, hips legs, and feet should all be in a straight line (like you’re doing a plank).
- Pull yourself up to the bar until your chest touches the bar.
- Lower yourself back down with proper form.
If this movement is TOO difficult, no big deal, we just need to back up a few steps.
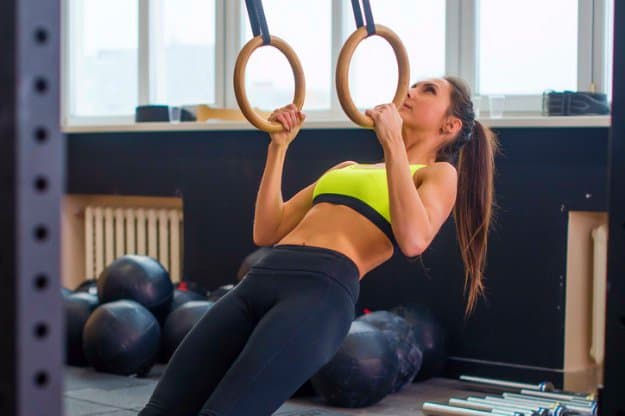
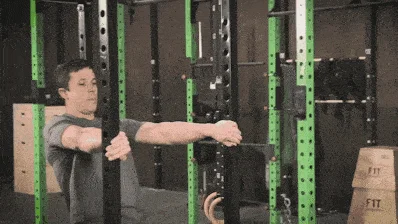
Set the bar higher so that when you lean back, your body isn’t down on the ground; maybe it’s only at a 45-degree angle.
We’ll walk you through a row progression right here.
Here’s coach again demonstrating it at a higher angle:
By setting the bar higher, it takes more of your body’s weight out of the equation.
As you get stronger (and/or lose weight), you’ll be able to drop the bar until you’re parallel when pulling yourself up.
TO KEEP PROPER FORM WHEN DOING AN INVERTED BODYWEIGHT ROW:
- Don’t let your butt sag (squeeze your buttcheeks, flex your stomach, and keep your body rigid from head to toe).
- Don’t flail your elbows. Grab the bar with your hands a little closer than you would if you were doing a bench press, and keep your elbows at that angle from your body.
- Pull the bar towards the middle of your chest. Don’t pull the bar up towards your throat, or down towards your belly button. Right in the middle!
- Keep your abs tight. Keep your abs tight throughout the whole routine. Your body should be a straight line the whole time, and the only thing moving is your arms.
- Pull your shoulder blades down and back towards each other through the movement. Don’t shrug your shoulders. Imagine you’re trying to pinch a pencil between your shoulder blades to keep it from falling!
- GO all the way. Don’t half-ass it. Lower yourself until your arms are completely extended, and raise yourself until your chest touches the bar.
How to Progress with Inverted Bodyweight Rows (6 Variations)
Let’s outline a strategy for advancing your skills in inverted bodyweight rows.
1) DOORFRAME ROWS
To begin, start by performing rows using a doorframe:
This will initiate the training of your ‘pull’ muscles.
2) TOWEL ROWS
Continuing with the doorframe, employ a towel to lean back even further, intensifying the challenge:
3) ELEVATED INVERTED ROW (HIGH)
Next, attempt the inverted row with the bar set high to ease into the exercise:

4) ELEVATED INVERTED ROW (LOW)
Once the inverted rows become manageable, lower the bar to increase the difficulty:
5) INVERTED ROWS ON RAISED SURFACE
By elevating your feet, you will heighten the difficulty of this exercise:
6) WEIGHTED INVERTED ROW
For a greater challenge in your inverted rows, consider adding some weight during the exercise:

When Should I Do Inverted Bodyweight Rows?
If you are building your own workout plan, you can mix in bodyweight rows wherever you normally do your pull exercises (pull-ups, pull-downs, rows, etc.).
When I go into a gym, my time is extremely limited, and I’m working towards developing strength.
Here’s a sample two day split for me:
- Day A: Squats, bench press, inverted rows, dips
- REST DAY: OFF
- Day B: Deadlifts, Overhead Press, Pull-Ups (or chin-ups), Planks (Floor Swipes).
- REST DAY: OFF
Both days work my full body, I can do a full routine in less than 40 minutes, and I’m building strength.
- If you can’t do dips on Day 1, you can do push-ups.
- If you can’t do pull-ups on day 2, you can substitute assisted pull-ups.
On the rows, aim for 3 sets of 10.
If you can’t do that, do 3 sets to however many reps you can do, and build your way up to 3 sets of 10.
Once you can do that, put your feet up on a chair, throw some weights in a backpack, put it on reverse (so the bag is hanging in front of you), and then do the rows.
You got this!
Overwhelmed? I personally know how that feels. It can be scary embarking on a strength training practice for the first time.
Are you doing your moves correctly? Should you be lifting more weight or less? What do you eat to reach your goals?
How to Do Inverted Bodyweight Rows at Home
Just because you lack access to a gym doesn’t mean you can’t effectively target your back muscles. You just need to get highly inventive.
Here’s a method for performing Inverted Bodyweight Rows at Home:
OPTION ONE: Utilize your kitchen table or desk. Exercise caution with this approach.
Lie beneath your table, ensuring that your head and shoulders extend beyond it.
Grasp the edge of the table with an overhand grip and pull yourself up (similar to the instructions provided earlier).
A word of caution: Avoid toppling the table and ensure you don’t damage it!
OPTION TWO: Acquire a sturdy, thick wooden dowel or pipe that can support your weight. Place it across two of your kitchen chairs and lie down underneath.
Ensure its stability, and confirm the bar won’t break or shift, then proceed to pull yourself up.
Remember, maintaining balance is crucial.
If you don’t have access to a pull-up bar or gymnastic rings, find a way to perform bodyweight rows, whether it’s between two chairs or under a table.
Use your creativity to adapt!
This approach will enable you to incorporate bodyweight rows into your Strength Training Routine!
If you have further inquiries about inverted bodyweight rows, feel free to ask in the comments below!